"contactPoint": [ { "@type": "ContactPoint", "telephone": "+91-8930231891", "contactType": "customer service", "areaServed": "IN" }, { "@type": "ContactPoint", "telephone": "+91-9813431891", "contactType": "customer service", "areaServed": "IN" } ] }

Uncategorized

Pav Bhaji at Zaikastreet

Pav Bhaji

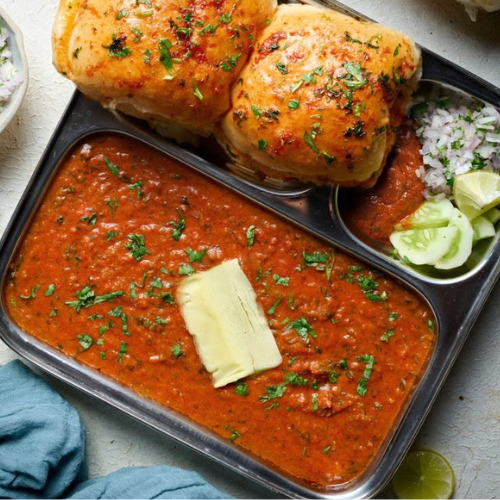
Pav Bhaji Recipe Pav Bhaji is beloved dish among Indians because it is everyone favourite. This popular street food is made with a spicy buttery vegetable mash which is served alongside soft toasted pav. Whether it is enjoyed as hearty evening snack or a quick dinner. It also served at festive gatherings. Pav Bhaji is cherished for its rich bold flavours and comforting texture. In this blog I will guide you step by step through the recipe to make delicious flavourful Pav Bhaji at home by using simple ingredients from your kitchen. Along the way i will also share useful tips and tricks to help you achieve the perfect texture and authentic street style taste. So without further let us get started and make the perfect Pav Bhaji together. What is Pav Bhaji? Pav Bhaji is popular Indian street food dish which is originated in Mumbai which is consisting of spicy mashed vegetable curry served with soft, butter toasted bread rolls . It is one of the most loved and widely consumed fast foods across India and it has gained global recognition for its bold flavors and comforting appeal. The bhaji is made with simmering a medley of vegetables like potatoes, cauliflower, green peas and capsicum, all mashed and cooked in butter and along with a special blend of spices known as pav bhaji masala. The dish is topped with a dollop of butter and served hot with pav that is toasted on a flat griddle with butter. It is Traditionally enjoyed as street food in Mumbai. The pav bhaji has become staple in restaurants home kitchens and even wedding buffets. It is vegetarian dish that is rich, flavorful and highly customizable which is often served with toppings like grated cheese, paneer or even turned into Jain pav bhaji. Why do people love pav bhaji? People love Pav Bhaji because it is the perfect combination of bold flavors comfort and indulgence. To begin with it features it is spicy buttery vegetable mash which is paired with crispy golden pav which creates a rich satisfying experience appealing to all ages. Although it is packed with vegetables it is still utterly indulgent and making the dish that strikes the ideal balance between health and taste. Moreover its roots in Mumbai vibrant street food culture add a nostalgic charm that resonates with many. In addition its versatility from adjustable spice levels to customizable toppings like cheese makes it suitable for everyone’s taste preferences. Whether enjoyed as a quick meal, party dish or late night snack. Pav Bhaji is undoubtedly a true crowd pleaser. Ingredients 3 to 4 medium potatoes. 1 cup cauliflower florest. 1/2 cup green peas. 1 cup finely chopped capsicum. 1 medium carrot 3 to 4 chopped / pureed tomatoes. 2 large chopped onion. 1 inch ginger, 6–8 garlic cloves 5 to 6 green chillies. 2 to 3 tablespoon pav bhaji masala. 1/2 tablespoon red chili powder. 1/4 tablespoon haldi powder. 1  tablespoon dhania  powder. 1/2 tablespoon garam masala. jeera — ½ tsp  Salt — to taste. Kasuri methi — 1 tsp crushed Tomato   puree — 1 to 2 tbsp Sugar  — a small pinch to balance acidity Butter — 3 to 4 tbsp Oil — 1 to 2 tbsp  Cream — 1 to 2 tbsp for extra creaminess Pav buns  — 8 to 10 Butter for toasting pav Chopped fresh coriander  Chopped onions Lemon Grated cheese  Extra butter to place on top of the hot bhaji Step‑by‑Step Pav Bhaji Recipe Step 1: Boil & Chopped Vegetables First wash peel . chop the vegetables including : potatoes, cauliflower, carrots, bell peppers, etc. Next boil potatoes, green peas, cauliflower and carrots until they are soft but not mushy. If you are using pressure cooker then let it cook for 2 whistles this step is essential to ensure that vegetables are properly cooked. Once done drain the boiled vegetables and be sure to reserve the water for later use in adjusting the bhaji is consistency. Optionally for added depth and a smoky flavor you can lightly roast some of the vegetables especially the bell peppers before adding them to the bhaji. Step 2: Make the base First heat deep heavy bottomed kadhai or tawa. Once it is hot add 1 tablespoon of butter melt it. Then add jeera . As soon as they begin to crackle immediately after that add finely chopped onions. cook onions till light golden brown. Next add ginger garlic paste . continue cooking for 2 to 3 minutes. Step 3: Add tomato Next add chopped tomatoes , green chilies into pan. Then cook mixture until tomatoes are soften and begin to break down. At this point you can choose the blend or mash the mixture further for smoother texture which is depending on your preference. Step 4: Add spice After that add turmeric, red chili powder and coriander powder . Then add pav bhaji masala and mix everything well. Continue cook spices on medium flame which allowing them to blend and release their full aroma. Step 5: Mix Well Now add boiled vegetables into the prepared masala mix. Using potato masher or back of a spoon mash everything together while stirring for combine the flavors. Gradually add the reserved water or hot water for adjust the consistency which aim for a thick semi-liquid texture that is not too watery. Step 6: Simmer & adjust texture Next cook bhaji for 7–10 minutes on low flame and stirring occasionally to prevent sticking. Toward the end add one tablespoon of butter for extra richness. Then sprinkle garam masala. Mix it . And finally stir in some fresh lime juice. At last garnishing the bhaji with chopped fresh coriander. Step 7: Toast the Pav Meanwhile slice the pav horizontally. Heat flat pan add butter and place the pav halves on it. Toast them until they turn crispy golden. For added flavor you can optionally dip one side of the pav in leftover bhaji before toasting. Step 8: Serve hot For serve the hot
Pav Bhaji Read More »

Samosa Recipe at zaikastreet

Samosa

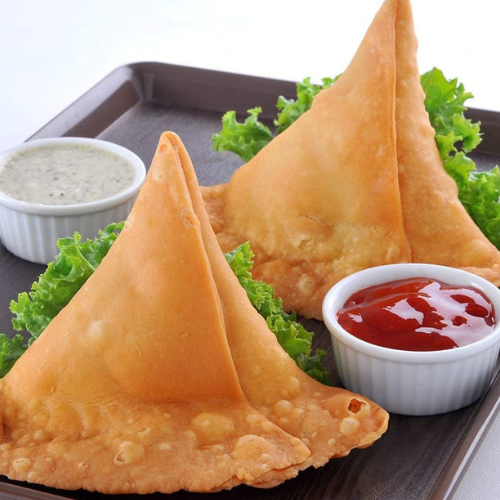
Samosa Recipe: It is famous for the Indian Samosa, which is everyone’s favourite. This popular deep-fried snack which  is made with a crispy outer layer and a flavorful, spiced potato filling. Whether it is served as a tea-time snack, at parties, or as street food, Samosas are loved for their perfect balance of crunch and flavour. In this blog, I will guide you through a step-by-step recipe to make delicious, crispy Samosa Recipe  at home using simple ingredients from your kitchen. Moreover, I will share useful tips and tricks to help you get the texture and flavour just right. So, let’s get started and make the perfect samosa together. What is Samosa? The  Samosa is a ubiquitous, triangular savory pastry that is typically deep-fried and stuffed with a flavourful mixture of spiced vegetables, potatoes, and peas, or sometimes meat. Originally from the Middle East, it later evolved into a favorite South Asian snack food. Today, it is consumed around the world as street food, an appetizer, or a tea-time snack, and is often served with chutneys or other complementary sauces. Thanks to its versatility and bold flavor, the samosa continues to win hearts across cultures and cuisines. Why do People Love Samosa? Samosas are a favorite among people because of their irresistible combination of textures and flavors. With a crunchy, golden pastry on the outside and a warm, flavorful filling on the inside—typically made of spiced potatoes and peas—they create a perfect harmony of taste and texture. In addition, they are comforting, convenient, and deeply rooted in cultural traditions. Whether enjoyed with tangy chutneys on the streets or served during festive occasions, samosas hold a special place in people’s hearts. Thanks to their hearty flavors, nostalgic appeal, and growing international popularity, they continue to be an all-time favorite snack across generations and geographies. Ingredients : 2 cup maida. 3 tablespoon oil or ghee. ½ tablespoon salt. Water as needed. 4 medium boiled mashed potatoes. ½ cup boiled green peas. 6 chopped green chilies. 1 tablespoon jeera. 1 tablespoon dhania powder. 1 tablespoon red chili powder. ½ tablespoon garam masala. ½ tablespoon amchur powder. Salt according to taste. 2 tablespoon oil. Oil. Step By Step Recipe: Step 1: Prepare The Dough: First, in a large bowl, mix the flour, salt, and oil together. Then, rub the oil into the flour until the mixture feels crumbly. Next, add water slowly, a little at a time, and knead the mixture into a smooth, fine dough. Once done, cover the dough and let it rest for 20–30 minutes before rolling. Step 2: Make Filling: First, heat 2 tablespoons of oil in a pan over medium heat. Once the oil is hot, add cumin seeds, chopped green chilies, and grated ginger. Let them sizzle for a few seconds until aromatic. Next, add the boiled peas and mashed potatoes. Stir well to combine, then mix in all the spices. Cook the mixture for 3 to 4 minutes, stirring occasionally so the flavors come together. Once done, take the pan off the heat and set the filling aside to cool completely before using it to stuff the samosas. Step 3: Shape The Samosa: After the dough has rested, divide it into small, equal-sized balls. Then, roll each ball into an oval shape using a rolling pin. Next, cut each oval in half to form two semi-ovals. Take one semi-oval and fold it into a cone shape, sealing the straight edge with a little water to hold it together. After that, fill the cone with the prepared potato mixture, making sure not to overfill. Finally, seal the open edge tightly with water to close the samosa completely. Step 4: Frying: To begin, heat oil in a deep pan over medium heat, making sure there’s enough oil for deep frying. Once the oil is hot, carefully add a few samosas at a time, making sure not to overcrowd the pan. Fry them in small batches, turning occasionally, until they turn golden brown and crisp on all sides. When done, remove the samosas using a slotted spoon and place them on tissue paper to drain any excess oil. Tips And Tricks For Perfect Samosa. For best results, use cold water to knead the dough, as it helps create a crisp texture. Always allow the dough to rest for at least 20–30 minutes before rolling, which makes it easier to handle and improves the final texture. Make sure the filling is completely dry, as excess moisture can cause the samosas to become soft. When shaping, seal the edges properly with water to prevent the filling from leaking during frying. Fry the samosas on medium heat to achieve an even, golden-brown crust. Lastly, avoid overcrowding the frying pan—each samosa needs enough space to cook evenly and maintain its shape. Serving Suggestion: Serve the samosas hot with green pudina (mint) chutney or sweet tamarind chutney for a  flavour. For a classic touch, pair them with a cup of masala chai which is perfect for evening snacks. When hosting parties, offer bite-sized cocktail samosas alongside a variety of dips to make them easy and fun to enjoy. In a restaurant setting, garnish the samosas with freshly chopped coriander, sliced spring onions, and lemon wedges to give them a polished, professional presentation. Healthier Alternatives: Everyone loves samosas, but many are concerned about health. Fortunately, there are several healthier ways to enjoy this beloved snack: First, try baking the samosas—brush them lightly with oil and bake at 180 degrees Celsius for 25 to 30 minutes until they turn golden and crisp. Another option is to use an air fryer, which gives you crispy samosas with much less oil. You can also swap out all-purpose flour for whole wheat flour to make a more wholesome version. Lastly, for a non-fried alternative, serve samosa chaat—crushed samosas topped with yogurt, chutneys, and spices—for a tasty and lighter twist. FAQ’s About Samosa: 1. Why are my samosa not making  crispy?   Either the dough was too soft, or they

Samosa Read More »

Chole Bhatue at zaikastreet

Chole Bhature

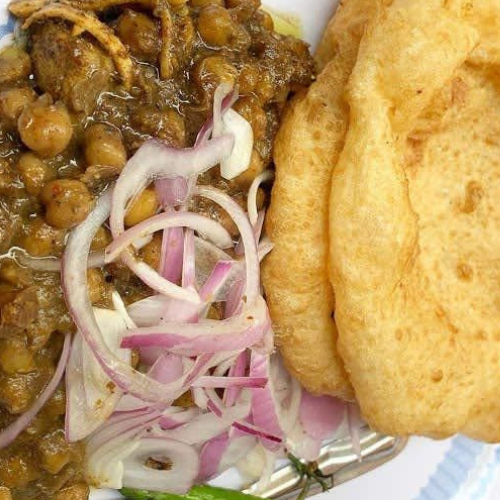
Chole Bhature is famous Punjabi dish comprising a spicy and flavorful chole and soft, bhature . It is rich and delicious combination which is served with pickles , crunchy onions, and lemon squeeze. Due to the strong flavors and filling ingredient, it is perfect for breakfast or brunch throughout North India. In this blog I will guide you step by step that how to make restaurant-style Chole Bhature at home. So, whether you are new to Indian cooking or already confident in the kitchen, you will find this easy homemade Indian recipe which is simple to follow. It is made with chole , maida , yogurt, and common Indian spices. What’s more, this dish is not just for breakfast it also makes a satisfying lunch or breakfast. So, if you’re craving authentic Punjabi food with rich, spicy gravy and perfectly bhature, then try this Chole Bhature recipe . If you want the real taste then visit at zaikastreet restaurant. What is Chole Bhature? Chole Bhature is a widely relished North Indian food consisting of spicy chole which is served along with light, fluffy bhature. Being a traditional Punjabi street food, today it has gained popularity in restaurants and Dhaba  throughout India. As the dish is heavy and rich, individuals tend to consume it for breakfast, lunch, or brunch. To make the chole, white chole is boiled in spicy and flavorful gravy with Indian spices. Meanwhile, the bhature is freshly prepared and served hot, and this contributes to the taste and texture of the food as a whole. For this reason, Chole Bhature is a filling meal that makes you feel full and contented. People enjoy this dish not just for its bold flavors, but also for the perfect mix of soft bread and spicy curry. So, if you are craving the real taste of Punjabi Chole Bhature then visit our restaurant and enjoy this delicious North Indian classic. Why do People Love Chole Bhature? People love Chole Bhature because it is not delicious but also hearty, satisfying meal which is packed with bold flavors. The spicy chole is served with soft bhature. it makes for a perfect combination that is both comforting and filling. As a result, it has become a go-to comfort food across North India. Whether it is for breakfast, lunch and dinner. Chole Bhature fits the occasion perfectly. it is the kind of dish that’s even better when shared with family and friends. Ingredients: For Chole: 2 cups chole(soaked overnight). 2 large onions(chopped). 3 tomatoes(chopped/pureed). 4-5 green chillies. 1 tablespoon ginger paste. 1 tablespoon garlic paste. 2 tablespoon dhania powder. 1 tablespoon jeera powder. 1 tablespoon garam masala. 1 tablespoon haldi powder. 1 tablespoon lal mirch. 2 tablespoon oil /ghee Salt Lemon.  Fresh coriander leaves for garnish. For Bhature: 2 cups maida. 2 tablespoons of  suji. ½ cup curd. ½ tablespoon baking soda. 1 tablespoon sugar. Salt. Water as needed. Oil  Step By Step Recipe: Step 1: Soak and Cook the Chole First, soak 1 cup of dried white chole in enough water overnight to let them soften properly. Next day, drain the soaked water completely. Next, transfer the chole to pressure cooker. Then, add 3 cups of water along with 1 tea bag, 1 black Elaichi, 1 tej patta and ½ teaspoon of salt. After that, pressure cook everything on a medium flame for about 5 to 6 whistles . until the chole are soft and cooked through. Once the pressure releases  open the lid and remove the tea bag and whole spices. Finally, drain the cooked chole and set them aside for the next step in the recipe. Step 2: Prepare the Masala Base First heat oil in pan. Use 2 tablespoons of oil. Next put 1 teaspoon jeera cook them. Then put ginger-garlic paste and green chilies and cook 30 seconds. Then put chopped onions and cook until golden brown. Now put pureed tomatoes and cook until oil begins to separate from the masala. then add spices like 1 teaspoon dhania powder, 1 teaspoon jeera powder, 1 teaspoon red chili powder, 1 teaspoon haldi and 1.5 teaspoons chole masala. Lastly mix the masala and cook until oil separates. Step 3: Mix Chole & Masala First, add the boiled chole and a little water from the boiled chole into the cooked masala. Then, mash a few chole with the back of a spoon to help make the gravy thicker. After that, cook everything on medium heat for 15–20 minutes without covering. Cook until the gravy thickens and becomes darker in color. Step 4: Final Adjustments First crush kasuri methi between your palms and add it to the chole. Then add anardana powder . After that add squeeze in some lemon juice to add more sourness. Next taste chole and adjust the salt or spices as needed. Finally garnish with fresh dhania leaves before serving. Prepare The Dough First take big mixing bowl. Then Add 2 cup Maida, 2 tablespoon Sooji , ½ teaspoon baking powder and baking soda, 1 teaspoon sugar and ½ teaspoon salt. Next add 2 tablespoon curd and 1 tablespoon oil. Mix everything well. Then slowly add water and knead the mixture into a soft, flexible dough. It should not be sticky. Once the dough is ready, rub a few drops of oil on top to stop it from drying. After that cover the dough with cotton cloth and leave it for 2–3 hours. Step 2. Roll The Bhature Once dough has rested . knead it again gently for short time. Then cut the dough into equal-sized balls. Next take one ball and roll it out with a rolling pin into a round or oval shape, about 6–7 inches wide. Be careful don’t roll too thin and too thick. If needed lightly oil rolling pin or the surface to stop the dough from sticking. Step 3. Fry The Bhature First heat oil in deep pan. check if oil hot . drop in a small piece of dough. If it rises to

Chole Bhature Read More »

Paneer Butter Masala Recipe zaikastreet

Paneer Butter Masala Recipe

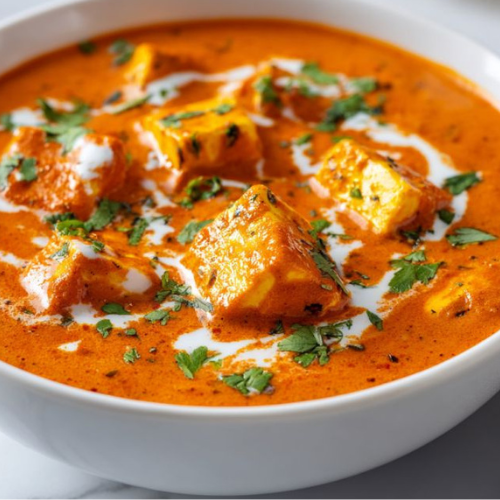
`There is something truly comforting about a bowl of rich, creamy paneer butter masala served with hot naan or fragrant basmati rice. Indeed, it is one of those classic North Indian dishes that you will find on almost every Indian restaurant menu. But did you know that you can recreate this delicious dish at home with ease? In this blog, I will guide you through a step-by-step recipe to make restaurant-style paneer butter masala using ingredients that you likely already have in your kitchen. Whether you’re a beginner just starting your culinary journey, or a seasoned cook looking to perfect your skills, this recipe is not only easy to follow but also packed with rich, authentic flavor. So, roll up your sleeves, gather your ingredients, and let’s dive into the world of creamy, flavorful Indian cooking — right from the comfort of your own home! What is Paneer Butter Masala? Paneer Butter Masala is a delicious and popular North Indian vegetarian dish. It features soft, succulent pieces of paneer that are gently cooked in a creamy, flavorful tomato and cashew-based sauce. The rich gravy, made with butter, cream, and a blend of aromatic spices, brings everything together into a comforting and satisfying meal. Typically, it is served with naan, roti, or steamed basmati rice, making it a versatile dish for any occasion. With the help of this blog and easy-to-follow steps, you can effortlessly recreate this restaurant-style Paneer Butter Masala in your own kitchen. The dish comes together using a variety of ingredients, including paneer, onions, tomatoes, cashews, butter, and ginger-garlic paste. Additionally, a carefully balanced mix of spices—such as red chili powder, garam masala, and coriander powder—enhances the flavor and aroma, giving the dish its signature taste. By following along, you’ll not only learn how to make this classic dish but also gain confidence in cooking authentic Indian food at home. Why do People Love It? People love Paneer Butter Masala not only because of its rich flavor but also due to its creamy and satisfying texture. The soft paneer, when combined with the smooth, buttery sauce, creates a dish that truly feels like a special treat. Moreover, it’s not overly spicy and has a subtle hint of sweetness, which makes it enjoyable for people of all ages. Typically, it is served with Indian breads such as roti and naan, or paired with steamed rice, making it a versatile option for any meal. As a result, it has become a staple in restaurants and is equally popular among home cooks. In addition, paneer is a healthy source of protein and calcium, which adds nutritional value to this indulgent dish — truly a delicious meal with added benefits. Ingredients: 1 tablespoon oil . 2 medium onions, chopped. 2 tablespoon butter. 3–4 medium tomatoes, chopped 10–12 cashew nuts 1-inch piece of ginger 3–4 garlic cloves. 2–3 green Elaichi. Water as needed. 1–2 teaspoons sugar. 1/2 teaspoon haldi. 1 teaspoons lal mirch . 1 teaspoons dhania  powder. 1/2 teaspoon garam masala. Salt . 250 gram paneer cut into cub. 1 tablespoon butter  1/4 to 1/2 cup fresh . cream (or malai). 1/2 teaspoon crushed  kasuri methi . Fresh dhania leaves for garnish. Step By Step Recipe: Step 1: Prepare Masala First, heat some oil in a pan over medium heat. Next, add the chopped onions and cook them until they turn soft and light brown, stirring occasionally to ensure even cooking. Then, add the chopped tomatoes, cashews, garlic, and ginger to the pan. Continue cooking the mixture until the tomatoes become soft and the mixture thickens, stirring as needed to prevent sticking. After that, allow the mixture to cool slightly. At this point, remove any whole spices, if you have added them. Once cooled, transfer the mixture to a blender. Add a little water and blend until you get a smooth, creamy paste. Step 2: Cook Gravy In the same pan, heat 1 tablespoon of butter over medium heat. Once the butter melts, add the blended paste to the pan. Stir well and cook for 5–6 minutes on medium heat, allowing the flavors to develop. Then, add the turmeric (haldi), red chili powder (lal mirch), coriander powder (dhania powder), and salt. Mix thoroughly to ensure all the spices are well incorporated into the gravy. Continue cooking the mixture, stirring occasionally, until the gravy thickens and you begin to see oil separating from the sides. This indicates the masala is well-cooked and full of flavor. Step 3: Add Paneer Next, add a little water to the gravy to adjust its consistency. Stir well to make the gravy smooth, rich, and easy to pour. Then, gently add the paneer cubes into the gravy. Mix carefully to coat the paneer evenly without breaking the pieces. After that, let it cook on a low flame for about 3 minutes, allowing the paneer to soak in the flavors of the masala. Step 4: At last Garnish: Now, add fresh cream to the gravy and gently stir to combine, giving the dish a rich and velvety finish. Next, sprinkle in the garam masala and crushed kasuri methi for added aroma and depth of flavor. Allow the gravy to simmer for another 2 minutes on low heat, so all the flavors meld together beautifully. Once done, turn off the flame and let it rest for a minute. Finally, garnish the dish with freshly chopped coriander (dhaniya) and, if desired, top it with a drizzle of cream or a small cube of butter for an extra touch of indulgence. Step 5:Serving Suggestions : You can serve this delicious Paneer Butter Masala with a variety of sides to complete your meal. For the best experience, pair it with soft Butter Naan or crispy Tandoori Roti. Alternatively, you can enjoy it with fragrant Basmati Rice or flavorful Jeera Rice. Each option complements the creamy, spiced gravy beautifully and enhances the overall taste. Tips And Tricks : Use Fresh Paneer: Always try to use fresh paneer, as it is soft and absorbs

Paneer Butter Masala Recipe Read More »

Hakka Noodles at zaikastreet

Hakka Noodles

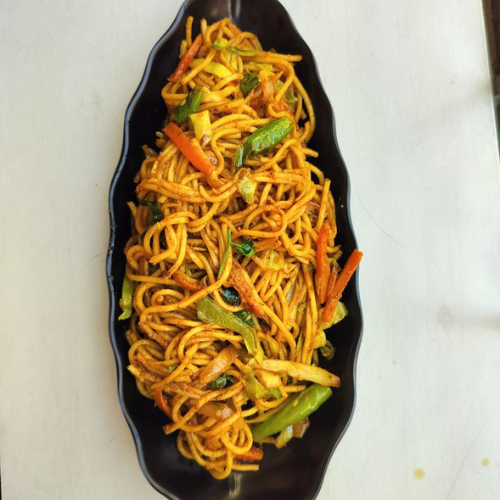
Hakka Noodles Recipe This restaurant style Hakka Noodles is everyone favorite. It is popular Indo Chinese dish which is made with stir fried noodles, mixed with fresh vegetables and flavorful sauces. In fact vegetable Hakka noodles are one of the most commonly ordered items in Indian restaurants. But the good news is you don’t have to dine out to enjoy them surprisingly . you can making them at home is very simple and quick. In this blog I will guide you step-by-step recipe to make restaurant-style Hakka Noodles right at home, using simple ingredients you probably already have in your kitchen. To make things easier, I’ve broken down each step clearly, so you can follow along with confidence. Whether you are beginner just starting out or an experienced cook looking for a quick and tasty meal idea .this recipe is both easy to follow and packed with bold flavors. Furthermore it is perfect for a quick lunch, a wholesome dinner, weekend treat for the whole family. What are Hakka Noodles?  It is popular in Indo- Chinese dishes  made by stir-frying boiled noodles with vegetables, soy sauce. Hakka noodles are one of the most ordered in Indian restaurants .  It is  perfect Indian Chinese Hakka Noodles that are flavorful and have great Indian Chinese Hakka noodles that are flavorful, delicious and have a great crunch in every bite. make it vegetarian or with a protein of choice with meat, eggs. Indo – chinese hakka noodles originated from the Chinese population living in kolata, India. right from the upscale restaurant to the street carts these are one of the most enjoyable. Unfortunately the noodles served in most of these places are loaded with oil and msg dehydrates us a lot . It is quick to make, full of flavor and loved for its slightly spicy, savory taste and crunchy veggies. Why do people love Hakka Noodles? People love Hakka noodles because they’re flavorful, quick, and comforting. With their perfect chewy texture and bold mix of soy, garlic, and chili sauces, they offer a delicious fusion of Chinese and Indian flavors. Packed with crunchy veggies or meats, they’re versatile and customizable to suit different tastes. For many, they’re also nostalgic — a favorite street food or quick meal that brings back memories of college, family dinners, or takeout nights. Ingredients Required for Veg Hakka Noodles For Noodles: 200 gram Hakka Noodles ( or plain noodles). 1 tablespoon oil . ½ teaspoon salt. For Stir Fry:  2 tablespoons oil. 1 tablespoon chopped garlic. 1 medium onion ( sliced).  1 medium carrot( cut into thin stripes). ½ cup cabbage( cut into thin stripes). ½ cup capsicum (chopped). ½ cup fresh beans ( thin sliced). 2 tablespoons spring onion ( garnish). Sauces: tablespoons soy sauce. 1 tablespoon green chili sauce. 1 tablespoon red sauce. 1 tablespoon vinegar. ½ teaspoon black pepper powder. ½ teaspoon sugar. Salt . Step by Step Recipe of Hakka Noodles Step 1: Boiling the Noodles. Take a large pan, add 4-5 cups of water and boil it. Place the pan on gas and turn the heat high. Wait until the water starts boiling. Add ½ teaspoon salt . Add 1 tablespoon of oil. Now  slowly add the noodles in boiling water. Mix to stop them from sticking together. Cook for 5 – 10 minutes( 80%). Mix slowly. Take one needle out, stay cool. If it should be soft but not mushy then drain water. And turn off the flame. Transfer the noodles into a strainer. Step 2: Prepare the Veggies: Wash the chopped vegetables properly. Heat oil in a large pan. Add chopped garlic, ginger and chili for 2- 3 minutes. Add onion and stir fry for 30 seconds. Add carrots, cabbage. fry vegetables on high flame  and  keep them crunchy. Add salt and pepper for  good taste. Step 3: Stir fry the Noodles: Add soy sauce, chilli sauces and vinegar into the pan with cooked vegetables. Cook everything well on high heat . Add boiled noodles to the pan. mix noodles and vegetables  Add black pepper and salt. Cook for 1–2 minutes and stir a little so the noodles get the sauce. Step 4: Serve: Taste the noodles. Add soy sauce, chili sauce and salt to make it tastier. put chopped spring onion on top of noodles. Turn off the flame .  At last Serve Tips and Tricks Use Hakka or chow mein noodles for the best texture. Don’t overcook the noodles.boil till just done and rinse with cold water. Prepare all vegetables and sauces before cooking. Cook on high heat to keep veggies crunchy and get a slight char. Add your favorite veggies like carrots, bell peppers, cabbage, and spring onions. Add  soy sauce, chili sauce, and a splash of vinegar. Add chopped spring onions at the end for freshness. Serving Suggestions: Serve hot as a main dish or snack Pair with Manchurian, chili chicken, or spring rolls for a full spread. Garnish with chopped spring onions for extra flavor. Add a lemon for sour taste. Enjoy with a side of chili sauce or soy sauce for dipping. FAQ’S What are Hakka Noodles? Hakka noodles come from the Hakka community in China, but in India, people cook them in their own way. The thin noodles are fried with crunchy vegetables, soy sauce, spices, and lemon juice. It is a tasty mix of salty, sour and spicy flavors. It is a simple dish with a bold taste that many people love. How Do I Keep the Noodles Soft But Not Sticky? This is a common problem .To stop noodles  from sticking, cook them until they are just soft enough, then rinse them with cold water right after draining. Add a little oil and mix. This keeps them from sticking, making them perfect for mix frying. Are Hakka Noodles Spicy? You can make Hakka noodles as spicy , mild as you like. Add chili sauce, fresh chilies also add spice and use less for a softer taste. What Goes Well With

Hakka Noodles Read More »

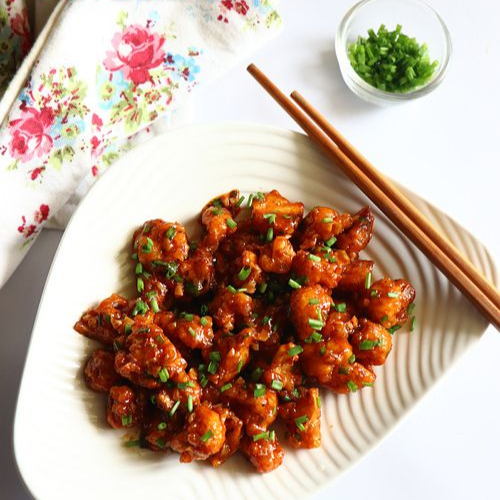
restaurant style gobi manchurian served in a plate with rice at zaikastreet restuarant

Gobi Manchurian

What Is Gobi Manchurian Recipe ? Gobi Manchurian is a beloved Indo-Chinese dish that features crispy, batter-fried cauliflower florets, which are then tossed in a spicy, tangy, and umami-rich sauce. As a result, this flavorful street food favorite is perfect for those who crave bold flavors and satisfying textures in every bite. Whether you prefer it dry or with gravy, Gobi Manchurian is endlessly adaptable and works wonderfully as a snack, appetizer, or side dish. In this post, I will guide you through a step-by-step recipe to make restaurant-style Gobi Manchurian at home, using simple, everyday ingredients. No matter if you’re a beginner or a seasoned cook, this recipe is easy to follow, and more importantly, it’s sure to impress! Why do people love gobi manchurian? People love Gobi Manchurian because it seamlessly combines the crispy texture of deep-fried cauliflower with the bold, tangy, and spicy flavors of Indo-Chinese sauces. As a result, it delivers a perfect balance of crunch, heat, and umami, making it an irresistible choice as a snack or appetizer — especially when served hot and fresh. Moreover, the dish holds strong appeal for vegetarians, as it offers a satisfying and flavorful alternative to traditional meat-based street food. Whether enjoyed at home or on the street, Gobi Manchurian continues to be a favorite for anyone craving something deliciously bold and comforting. Ingredients For Gobi Manchurian: 1 medium cauliflower cut into cubes 1 tablespoon salt. 1/2 tablespoon haldi powder. 1 cup maida. 1/2 cup cornflour. 1 tablespoon ginger- garlic paste. 1/2 tablespoon kali mirch powder. 1 tablespoon lal mirch powder. 1/2 tablespoon soy sauce. salt. water for thick batter. oil for frying. For Manchurian Sauce: 2 tablespoon oil. 1 tablespoon garlic finely chopped. 1 tablespoon ginger finely chopped. 4-5 green chili. 1/2 cup  chopped spring onion. 1/2 cup chopped onion. 1/2 cup  chopped capsicum . 2 tablespoon soy sauce. 1 tablespoon chili  sauce. 1 tablespoon tomato ketchup. 1 tablespoon vinegar. 1 tablespoon cornflour slurry( 1 tablespoon cornflour+3 tablespoon water). 1/2 cup water for gravy. salt & pepper to taste. spring onion for garnish. Step By Step Gobi Manchurian Recipe Step 1: Prepare the cauliflower   Wash and Cut cauliflower into pieces. Boil water  for 2 to 3 minutes with salt and haldi . After that drain it Step 2: Make the batter:   Mix 1/2 cup maida. 1/4 cup cornflour. Ginger, Garlic paste , Pepper and Salt. Add water little by little to make a thick, coating  batter. Step 3: Fry The Cauliflower:   Heat oil in a pan. Dip the cauliflour piece batter and deep fry til golden brown. Drain on tissue paper. Step 4: Preapre the Manchurian Sauce   Heat 1 tablespoon oil in pan. Add chopped ginger, garlic and green chilies . cook for 2 minutes Add spring onion and capsicum . cook for 2 to 3 minutes. Step 5 : Add Sauces   Add soy sauce, tomato ketchup, chilli sauce, vinegar and pinch of sugar. Mix well and cook for 4 to 5 minutes. Step 6: Thicken The Sauces   Add cornflour slurry and cook till the sauce thickens and shiny. Add salt according to need. Step 7: Mix the cauliflower   Add crispy fried gobi to the sauce . Cook on high heat for 4 to 5 minutes until well coated. Step 8: Garnish And Serve:   Turn off the flame . garnish with chopped spring onion. Serve hot as a dish or as a stater. Serving Sugestions: Serve Gobi Manchurian hot and fresh to enjoy its best texture and flavor. Before serving, garnish it generously with chopped spring onion greens for added color and crunch. Whether you’re hosting a party, planning a family dinner, or simply craving a fun evening snack, this dish makes for a perfect, crowd-pleasing starter. To make it a complete Indo-Chinese meal, pair it with Schezwan fried rice or Hakka noodles. The bold flavors complement each other beautifully, creating a satisfying and well-balanced plate. Tips And Tricks: First, dip the cauliflower in boiling water, but don’t overcook it :  Boil the cauliflower pieces for just 4 to 5 minutes. Overcooking will make them too soft, which affects the final texture. Next, dry the cauliflower thoroughly before battering:   After boiling, place the pieces on a clean cotton cloth to remove excess moisture. If they remain wet, the batter can become thin and won’t stick properly, making it hard to achieve crispy Gobi Manchurian. Then, prepare the batter using cold water:   Using cold water helps keep the batter light and ensures the coating turns crispy when fried. After that, fry on medium heat :  Avoid low heat, as it will cause the gobi to absorb oil and become soggy. On the other hand, high heat may brown the exterior too quickly while leaving the inside undercooked. Maintaining a medium flame gives the best result. When you’re ready to serve, toss the Gobi in sauce :  Always combine the fried Gobi with the sauce just before serving. Letting it sit for too long will cause the crispy coating to turn soft. Finally, balance the sauces to suit your taste :  Add soy sauce, chili sauce, and ketchup as per your preference. For a touch of balance, include a pinch of sugar to offset the heat, if needed. FAQ’S By Gobi Manchurian Recipe Can i make Gobi Manchurian in advance? yes, fry gobi pieces earlier, but toss in sauce just before serving Is Gobi Manchurian vegan? yes, it is completely plant based. Why does my Manchurain turn soft? because it was left in sauce for too long before serving. yes, fry gobi pieces earlier, but toss in sauce just before serving yes, it is completely plant based. because it was left in sauce for too long before serving. Conclusion: Gobi Manchurian is a perfect blend of crispy cauliflower, bold sauces, and Indo-Chinese spices. With this step-by-step recipe, you can easily recreate the restaurant-style Gobi Manchurian at home—both dry and gravy versions. Whether you’re hosting guests or just craving a spicy treat,

Gobi Manchurian Read More »

4 bold Steps to Spring Power & Positive Vibes at zaikastreet karnal

Spring Roll

What is Spring Roll Recipe? These Spring Roll Recipe are a popular Chinese snack consisting of crispy rolls filled with a savory mixed vegetables stuffing. Specifically, hot handheld pockets of spiced veggies are wrapped and deep fried, making for an endlessly adaptable and delightfully dippable snack. Moreover, this yummy recipe for crispy vegan Veg Spring Rolls can be made with whatever veggies you have on hand. In fact, I’m excited to show you how to make your favorite Indo-Chinese street food at home using just a few simple ingredients! In this post, I’ll show you a step-by-step recipe to make crispy, delicious spring rolls at home—just like the ones you get at restaurants!Whether you’re a beginner or an experienced cook, this recipe is easy to follow and uses simple ingredients you likely already have in your kitchen. Therefore, perfect as a snack, appetizer, or party starter, these spring rolls are sure to impress. Why do people love Spring Rolls? People love spring rolls because they’re crispy, tasty, and fun to eat. Typically, they’re filled with flavorful vegetables, noodles, or meat, wrapped in a thin layer and fried until golden brown. Additionally, some versions are light and fresh, which makes them a great option for health-conscious eaters too. Furthermore, they’re also easy to dip in different sauces, which adds to the fun and flavor. Whether enjoyed as a snack, starter, or party food, spring rolls are loved for their crunch and delicious filling. Ingredients: For Filling: 1 cup finely chopped cabbage. ½ cup grated carrot. 2 cups thin sliced capsicum(red, yellow, green). ½ chopped spring onion. 1 tablespoon chopped garlic. 1 tablespoon chopped ginger. 2 tablespoons soy sauce. 1 tablespoon vinegar. 1 tablespoon chili sauce. For Wrapper. Ready made spring roll sheets/ homemade sheets using flour, water, and salt. For Frying. Oil  Step By Step Recipe :        Step 1: prepare the filling: First, heat oil in a pan. Next, add ginger and garlic paste and cook for 30 seconds. Then, add carrots, cabbage, and capsicum, and cook for 2-3 minutes. After that, add spring onion for freshness Following this, add soy sauce and sesame oil. Finally, let the filling cool completely before rolling.      Step 2: prepare the base: First, take one spring roll sheet. Then, place the spring roll wrappers on a flat surface. If using rice paper, dip each sheet in warm water for 5 seconds and place it on a clean, damp towel. Next, place a spoonful of filling on one corner. After that, fold from the sides and roll tightly like a cylinder. Finally, salt the edge with a paste of flour and water to prevent opening while frying.     Step3 : Frying First, heat oil in a pan. Once the oil is hot, carefully drop the rolls in and fry until golden. Then, remove them onto tissue paper to absorb the excess oil.     Step 4: Serving: Serve with hot sweet chili sauce, or alternatively, soy sauce, and also peanut sauce. Tips and Tricks of Spring Roll Heat frying: Fry on medium high heat to make them golden and crunchy. Presentation: Cut rolls diagonally and serve upright  for a restaurant look. Crispiness secret : Always cool the filling before stuffing to avoid getting wet. Tight rolling: Make sure there are no air bubbles, or oil can get inside while frying. Storage :Put the uncooked rolls in sealed bags and freeze. Fry them when you want. Add spices : Add garlic, ginger, or green onions to make the filling more tasty. Drain Properly: Put fried rolls on a wire rack or paper towels to soak up extra oil. Seal Tightly: Use a flour-water paste to seal the edge for fried rolls. Press the edge firmly so it doesn’t open during frying. Variations And Substitutes:     1. Different Filling: You can use lots of veggies like cabbage, carrots, and bell peppers. Try adding chicken, shrimp and tofu for some protein. Sometimes noodles are added for extra texture.        2. Different Wrapping: Rice paper wrappers are soft and used for fresh spring rolls. Wonton wrappers are thin and crispy when fried. You can even use lettuce leaves for a fresh and low-carb option.    3. Different Way To Cook: Most spring rolls are fried for that crispy crunch. You can bake them in the place of healthier option. Or keep them fresh and skip frying altogether.     4. Different Dipping Sauce: Sweet chili sauce is a popular choice. Soy sauce or tamari works well too. Peanut sauce adds a creamy, nutty flavor. Serving Suggestions: Serve spring rolls with sauces like sweet chili, soy sauce and spicy garlic sauce. Add light salad on the side. Pair them with noodles or fried rice for a complete meal. FAQ’S Of Spring Roll Recipe What are spring rolls? Spring rolls are a popular snack  which is made with vegetables, meat or seafood in thin dough sheets. It can be fried or served fresh. How can I make spring rolls crispy? fry them in hot oil until they are golden brown. Can I bake spring rolls in the place of fry? Yes, baking is a healthier way and still makes them a little crispy.   Which sauce tastes good with spring rolls?  chili sauce, tomato sauce and soy sauce. Can I make spring rolls in advance? Yes, you make spring rolls in advance.  covered with cotton cloth so they don’t dry . Fried spring rolls are best when eaten fresh. Spring rolls are a popular snack  which is made with vegetables, meat or seafood in thin dough sheets. It can be fried or served fresh. fry them in hot oil until they are golden brown. Yes, baking is a healthier way and still makes them a little crispy.    chili sauce, tomato sauce and soy sauce. Yes, you make spring rolls in advance.  covered with cotton cloth so they don’t dry . Fried spring rolls are best when eaten fresh. Conclusion: Spring rolls

Spring Roll Read More »